Lightroom Presets: Download 1000+ Best Presets

Influencers and photographers use presets for Adobe Lightroom to edit photos professionally in seconds. Now you can access the best presets for mobile and desktop in less than 2 minutes. 

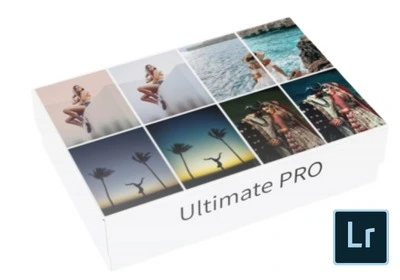
1000+ Presets Included

Lightroom presets empower you to edit photos like a pro in just seconds. Let’s face it: as an influencer or social medial professional, you love to share great images fast and on the fly. There is no need to ask a graphic designer to “photoshop” your images if you have access to some of the best presets. Delight your audience with a uniform look and feel that is consistent with your brand style, or simply enhance your images for a more professional look. 


Complete Lightroom Preset Kit

Expert touches for 2000+ categories (weddings, nature, sunset, vintage, fashion and more)

Download Our Premium Lightroom Preset Bundle

In just 3 easy steps you can access only lightroom preset bundle you’ll ever need.

1. Fast Checkout

Order securely in less than 1 minute. You will then receive instant lifetime access to some of the best lightroom presets.

2. Download

Download all our premium files for use on desktop, laptop, tablet & mobile. Save all files on your device for future use.

3. Apply Presets

Follow our simple guidelines below on how to apply presets to any of your photos for a more professional look and feel.

FAQ's

In this FAQ section we will aim to provide a comprehensive guide on how to install and use Lightroom presets for mobile or desktop.

Lightroom comes installed with a limited amount of presets. These can be used and customized to create new presets or users have the ability to import presets created by other users for their own application.

Some presets found online are free, but paid presets are also available for purchase. Which presets are used will depend on the desired result required for the images being used.

The install process is slightly different depending on the version of Lightroom and the type of device (mobile or desktop). Lightroom for mobile is free to download for IOS and Android users from either the Apple App Store or from Google Play Store. It is possible to upgrade to a paid version which provides additional editing tools, but this is not needed for the use of presets.

Once you have access to your new preset, follow these 3 easy steps to install it on LR:

  1. In the menu bar, select File > Import Profiles & Presets.
  2. An Import dialog will show up. No find the “required path” and select all the presets you want to import.  browse to the required path and select profiles or presets that you want to import. 
  3. Click on “Import”.

 
In the sections below we will provide specific guidance on four distinct methods:
  1. Install Lightroom Presets: IOS Mobile Device
  2. Install Lightroom Presets: Android Mobile Device
  3. Install Lightroom Classic CC Presets: Desktop Windows / MAC
  4. Install Lightroom CC Presets: Desktop Windows / MAC
 

Step 1: Install the application

Ensure the latest version of the application is installed. This can be done through the Apple App Store and is free to download.

Step 2: Download and save the preset

Select the preset that needs to be downloaded. For paid presets, the download file will become available after payment has been made. Download the “DNG” file. The DNG preset file will have all of the preset settings saved within the file. On most occasions the file will be saved directly to the Lightroom application.

If the file is in .ZIP format, it can still be downloaded to the mobile device. Save it to the “Files” app on your phone where the files can be extracted. If this is not possible, there are free file extraction applications available for download through the App Store.

Step 3: Open the preset

Open the Lightroom application. In the case of directly downloading a .DNG file, the images should already be visible in Lightroom. Alternatively, click on the  “Add” icon, then navigate to the folder with the extracted images and add the images to Lightroom.


  • Click on the first image from the .DNG file in order to open it.
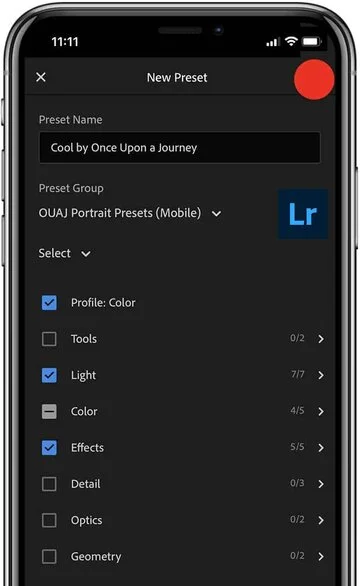
  • Select the three dots icon (…) and press “Create Preset” and give the preset a name..
  • Click on “Create New Preset Group” if there is more than one preset in a series. This will make it easier to find at a later stage. Create a name for the preset group and save.
  • The following default boxes can be left unchecked.


  • Do this for all the .DNG files in the preset series.

Step 4: Use the preset

Open any image that you want to use the preset on and select the preset from the “Presets” panel or tab. Click on the preset to apply it to the image.

Step1: Install the application

The Lightroom application can be downloaded for free from the Google Play Store application on your mobile device.

Step 2: Download and save the preset to your mobile device

Find the desired preset and download to your mobile device. The preset might be a .DNG file or it could come in the form of a .ZIP folder.

Step 3: Open and save the preset in Lightroom

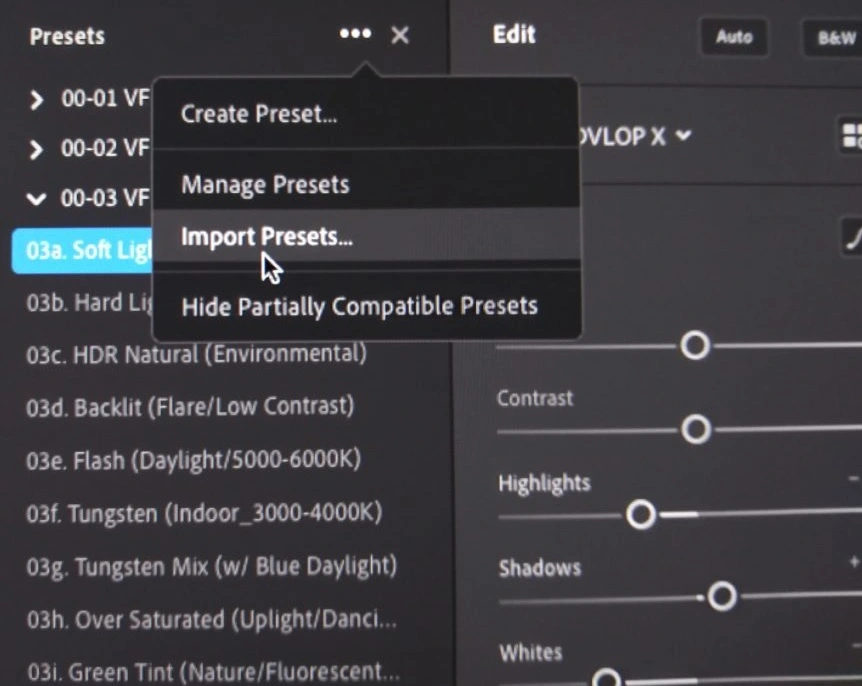
Open the Lightroom application on your mobile device. If the preset images are not showing in the Library, go to the “Presets” tab and press on the three dots (…) icon. From there select “Import Presets”. Navigate to where the .ZIP file is saved on your device and click to import the presets.

Note: Use the “My Files” app on the mobile device to extract the contents of the .ZIP files if it can’t be imported directly from Lightroom.

Step 4: Use the preset

The preset can be found under a newly created group in the “Presets” tab. You are able to rename the presets as well as the preset group.

Step 1: Download the preset

Download the desired Lightroom presets. The file can be in either .xmp or .lrtemplate format.

Step 2: Import an image 

Import and open the photo you want to apply the preset to in Adobe Lightroom Classic CC and click on the “Develop” tab in the upper right of the application screen.

Step 3: Import the preset

On the left of the “Develop” screen you will find the “Preset” panel. Click on the (+) icon and select “Import Presets”.

Step 4 : Apply the preset

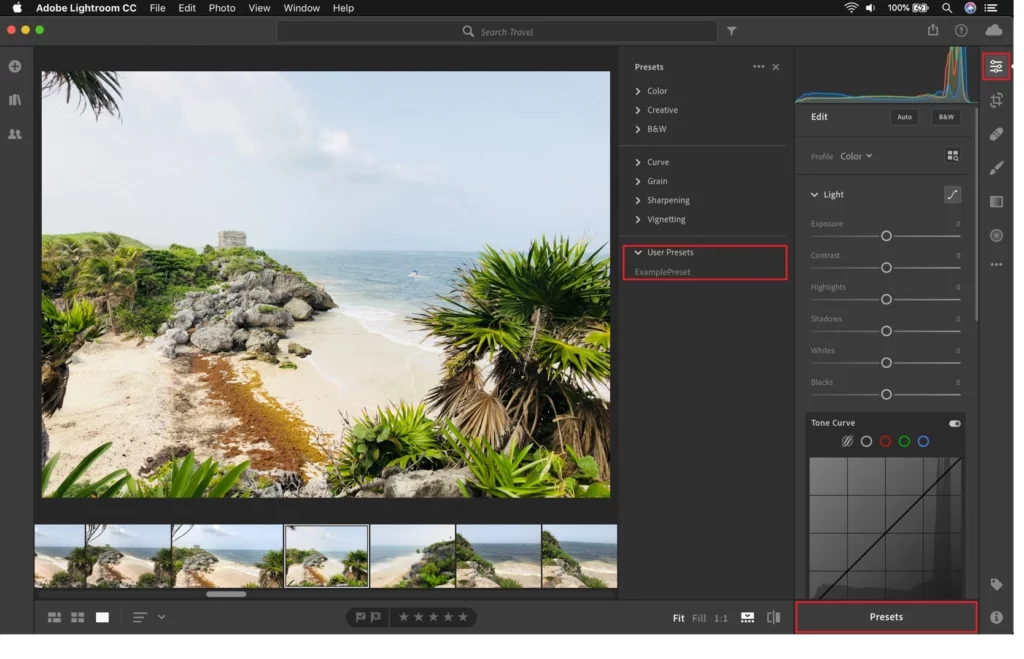
The downloaded preset will automatically sit under the “User Presets” option. From here, it can be selected and the preset will be applied to the image.

Step 1: Download the preset

Download the desired Lightroom presets onto your desktop device. The files can be in either .xmp or .Irtemplate format.

Step 2: Import the preset into Adobe Lightroom CC

Open the Adobe Lightroom CC application on your desktop computer. 

  • Go to “File > Import Profiles and Presets”.
  • Navigate to where the preset file is saved on your computer and click “Import”.

Step 3: Use the preset

  • Open the image that you want to apply the preset to and click on the “Edit” icon on the right.
  • Select the “Presets” button that can be found on the bottom and apply the desired preset to the image.

Note: After the preset has been applied, adjustments can still be made to the image to achieve the desired look.

Right here. You can access a versatile list of presets to cover more than 1000+ photo scene categories. Our specialist media team created the most popular lightroom presets in the world for both mobile and desktop usage. 

Yes absolutely. When you start of as an influencer you may not have a clear brand style guide. Later on as your business grows, the need arises to unify the brand message, either across your entire feed, or even for various groups of highlights. One of the most widely used solutions to revamp an Instagram, Tiktok or Facebook feed is certainly the use of lightroom presets.

Yes. The use of wedding photography presets are valuable and around 95% of professional photographers make use of it. It saves time and can help clients obtain the kind of images to capture the moment. Beautiful aesthetics for wedding photographers are finally within reach without breaking your budget.

This is a great question which can be best explained with some specific examples:

Presets have become the most common term. Originally because Adobe Lightroom users make use of presets to quickly enhance their photos. It makes universal changes to an image and has up to 60 settings. The degrees to which presets can change an image, depend on whether it is a “tool” type preset to change only one aspect, for example to just brighten elements of pink to red if you were to change the lipstick of a model, or a “layer” type preset that applies a mask over an image, affecting the entire image regardless of it’s various colors and shades. 

The industry standard for lightroom presets, are the file types DNG and XMP.

 
Filters tend to be integrated into mobile devices, or into apps – like TikTok, Viberr and Instagram. Unlike presets, filters cannot be edited, hence they have more limitations.

Overlays are different in the sense that it is actually another image that is blended over your existing image. This is why most commonly, a JPG or PNG file is used as an overlay. It is used in web technologies for design, but also in graphic software like Photoshop, Elements, Gimp etc.

Actions

Most people are familiar with Excel and Google Sheet macros. Well, in graphic design and photography, we have something similar, called “actions”. 

Numerous software commands combined, create a specific manipulation to an image. When we record this to be reproduced  by other future users, it is called “actions”. 
 

Our creative team worked hundreds of hours with many studios to provide you with the best lightroom presets in the world. This is available at a nominal fee. You can also search the web for a few presets for free download, albeit that this will be more time-intensive.

Yes. Our bundle includes a high number of mobile and desktop presets so that you can create professional photos across devices. The lightroom CC mobile app is typically used for mobile devices, whereas desktops and laptops will make use of Adobe’s desktop-specific solutions. 

Next-Level Photography With Lightroom Presets

A few years ago, people started realizing that some of the most phenomenal enhancements to photos can make the experience so much better for both photographers and clients. Then came the influencers on social media, who joined the revolution and started to apply lightroom presets to their posts.

There are a few popular types of Lightroom presets that can help your workflow:

The first type is the Creative Presets. These are perfect for giving your photos a unique look and feel. They can be used to add artistic flair to your photos or to create a certain mood.

The second type is the Workflow Presets. These are designed to help you speed up your workflow by automating some of the tasks that you would normally do manually. For example, there are presets that will automatically apply lens corrections or remove chromatic aberration.

The third type is the Utility Presets. These are designed to make your life easier by providing quick solutions to common problems that you may encounter when editing photos. For example, there are presets that will quickly fix over-exposed or underexposed photos. Which type of preset is right for you will depend on your needs and preferences. If you’re just starting out with Lightroom, we recommend trying out a few different types to see which ones work best for you.

Today, this is available to everyone. It can be a real game changer that will make your photography journey a lot more fun while impressing followers. Download all the latest and best lightroom presets in one go: This is probably the only bundle you’ll ever need to help you throughout your photography career and adventures. You’ll go from vintage presets to moody, professional, sunrise / sunset to wedding and classic presets and beyond. Get our latest desktop and mobile presets today, it is literally a few clicks away.